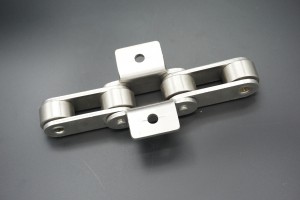
Are you a motorcycle or bicycle enthusiast looking to maintain your riding performance? Understanding the fundamentals of vehicle roller chains is essential. Roller chains play a vital role in transmitting power between the engine and the rear wheels, ensuring a smooth and efficient ride.
A key feature of roller chains is the master link. It allows for easy installation, removal and maintenance of the chain. In this blog post, we’ll guide you through the step-by-step process of installing a master link on O-ring roller chain, giving you the knowledge to handle this important task with confidence.
Step 1: Gather Necessary Tools and Equipment
Before beginning installation, have the following tools and equipment at hand: chain breaker tool, needle nose or snap ring pliers, stiff brush, and suitable lubricant.
Step 2: Prepare the Chain
Use a stiff brush and a mild degreaser to thoroughly clean the roller chain to remove any dirt or debris. Make sure the chain is dry before proceeding to the next step.
Step Three: Orient the Chain
Arrows are printed on the outer plate of most roller chains to indicate the direction of motion. Make sure the master linkage is facing the correct direction as indicated by the arrow.
Step 4: Insert main link
Remove the ends of the roller chain and line up the inner panels. Insert the rollers of the master links into the corresponding chain openings. The clip of the master link should face the opposite direction of chain movement.
Step 5: Secure the Clip
Using needle nose pliers or snap ring pliers, push the clip to the outside of the outer panel, making sure it is fully seated in the groove of the two pins. This will ensure the master link is in place.
Step 6: Fasten the Clip Properly
To avoid any potential accidents, it is critical to ensure the clips are properly seated. Gently pull the chain on either side of the master link to verify that it will not loosen or shift. If necessary, readjust the clip until it is firmly seated.
Step 7: Lubricate the Chain
Apply a suitable lubricant to the entire roller chain, making sure all parts are well coated. This will help reduce friction, extend the life of the chain and improve overall performance.
Congratulations! You have successfully installed a master link on an O-ring roller chain. Remember to do regular maintenance by cleaning, lubricating and checking the chain for wear. Regular replacement of the entire chain is essential to ensure optimum performance and safety.
Installing a master link on O-ring roller chain may seem daunting at first, but with the right tools and following these step-by-step instructions, you can master the task in no time. By learning and performing routine maintenance on your roller chain, you can not only ensure your ride remains reliable, but also enhance your overall riding experience.
Remember, proper installation and maintenance of roller chain contributes to your road safety while extending the life of your valuable investment. Happy riding!
Post time: Jul-22-2023

