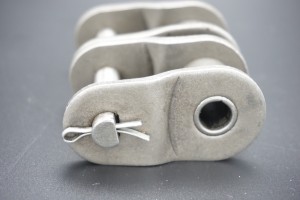
Roller blinds have become a popular choice for curtains due to their functionality and sleek design. However, it is not uncommon for roller blind chains to wear out or break over time. If you ever find yourself needing to replace or install new roller shutter chains, don’t worry! This blog post will walk you through the process step by step to ensure a successful and smooth installation.
Step 1: Gather the Necessary Tools
Before starting the process, make sure to gather all the necessary tools. You’ll need replacement roller shutter chains, a pair of pliers, a small screwdriver, and a safety pin.
Step 2: Remove the old chain
First, you need to remove the old roller shutter chain. Locate the plastic cover on top of the roller shade and carefully pry it off with a small screwdriver. After removing the cover, you should see the old chain attached to the shutter mechanism.
Use a pair of pliers to find the connecting link between the old chain and the shutter mechanism. Gently squeeze the links to remove the chain. Be careful not to damage any surrounding parts when doing this.
Step 3: Measure and Cut the New Chain
After successfully removing the old chain, it’s time to measure and cut the new chain to fit your roller shade. Spread the new chain along the length of the shutter, making sure it runs from one end to the other.
To determine the proper length, make sure the chain reaches the desired height when the shutter is fully extended. It’s always wise to leave yourself some extra length, just in case.
Using a pair of pliers, carefully cut the chain to the desired length. Remember, it’s best to cut it too long to begin with, as you can always trim it later if needed.
Step 4: Connect the New Chain
Once the chain is cut to the perfect length, it’s time to attach it to the roller shade mechanism. Start by threading one end of the chain through the hole in the shutter mechanism. Use the safety pin to temporarily secure the chain in the hole.
Slowly and carefully, begin to thread the chain through the various pulleys and rails inside the shutter mechanism. Take your time to make sure the chain is properly aligned and running smoothly.
After passing the chain through the mechanism, check the function of the shutter by rolling it up and down a few times. This will help identify any possible problems and ensure proper chain installation.
Step 5: Final Adjustments and Testing
After successfully attaching the new chain, some final adjustments and testing are required. Trim excess length from the chain, making sure the chain doesn’t hang too low or get tangled in the shutter mechanism.
Roll the blind up and down a few more times to check for any stuttering or snags. If all goes well, congratulations – you have successfully installed your new roller shutter chain!
Replacing or installing roller blind chains may sound daunting at first, but with the right tools and step-by-step guidelines, it becomes a simple process. Following the instructions above, you can easily replace the chain and restore the functionality of the roller blind with minimal effort.
Just remember to take your time, measure accurately, and make sure the chain is threaded correctly through the blind mechanism. With a little patience and care, your roller blinds will be looking and working like new in no time!
Post time: Jul-20-2023

